Welcome to stage 2 of “Time for some new exhaust tunes”.
If you haven’t read the stage 1 post it’s here.
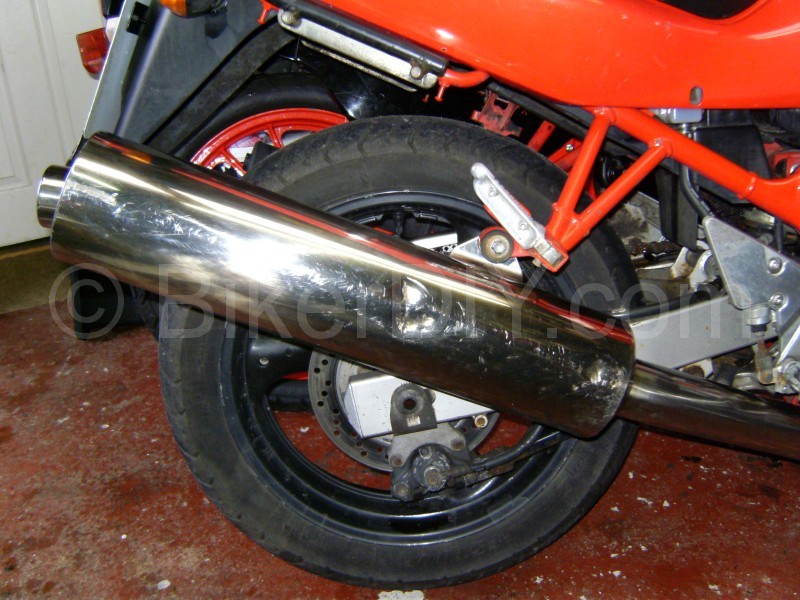
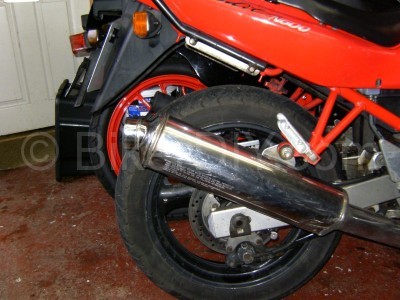
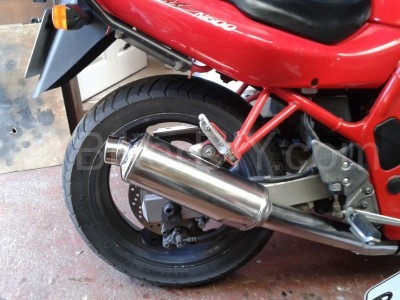
If you have read it, then you will know that at this point I have my stock 600 end can replaced with a stock 650 end can with no apparent loss in performance 🙂 ,
just in looks 🙁 .
Here’s a reminder of how it sounds…
Now, I have to decide how to approach modifying the original Bandit 600n stock end can.
The forum thread I was following said that they had cut out the baffle nearest the end (of the end can) and welded back on the end cap. According to the post the result was an exhaust that sounded good and with no sign of flat spots in the engine’s power delivery.
The forum thread was a little light on specifics however and after reading quite a few others where exhaust mods allegedly resulted in flat spots and other engine performance issues I really would have preferred some solid figures that I could work to. But since I couldn’t find any, but I did have a working exhaust system on the bike while I messed about, I elected to have a go myself and maybe share some more specific details as I found them.
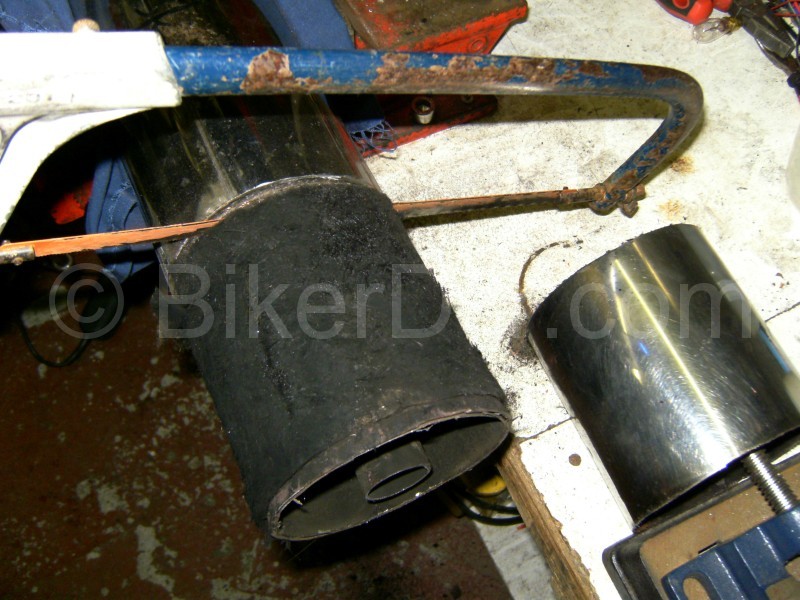
And so I find myself cutting the end off of an otherwise perfectly fine and working Bandit 600 end can.

Funnily enough (to me at least) the stainless steel outer cover gave up to the hack saw easily enough, but the steel innards of the can put up a proper fight, the hacksaw blade hardly marked it.
So I had to take the 4″ grinder to it, which wasn’t as subtle as I’d like and also the 4″ wheel couldn’t reach the pipe in the centre. I didn’t mind that at the time though, I was hoping that the last internal pipe was a push fit anyway.
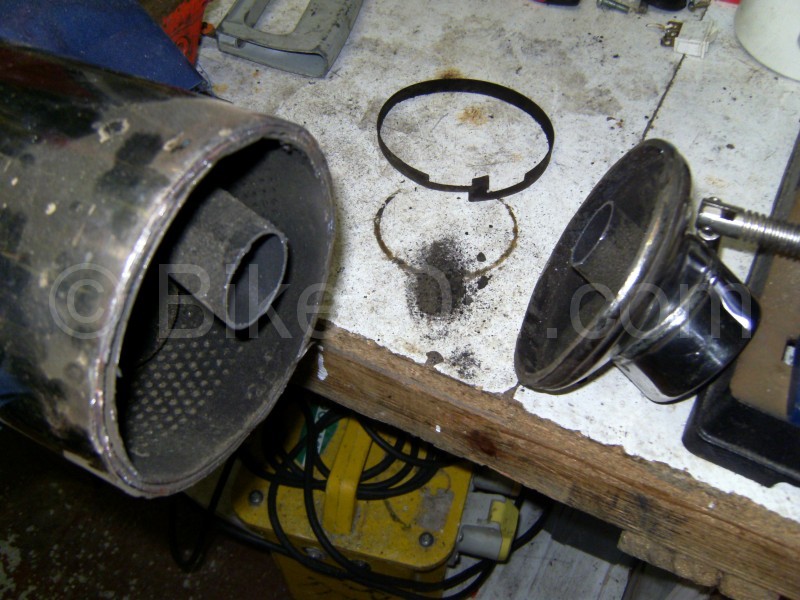
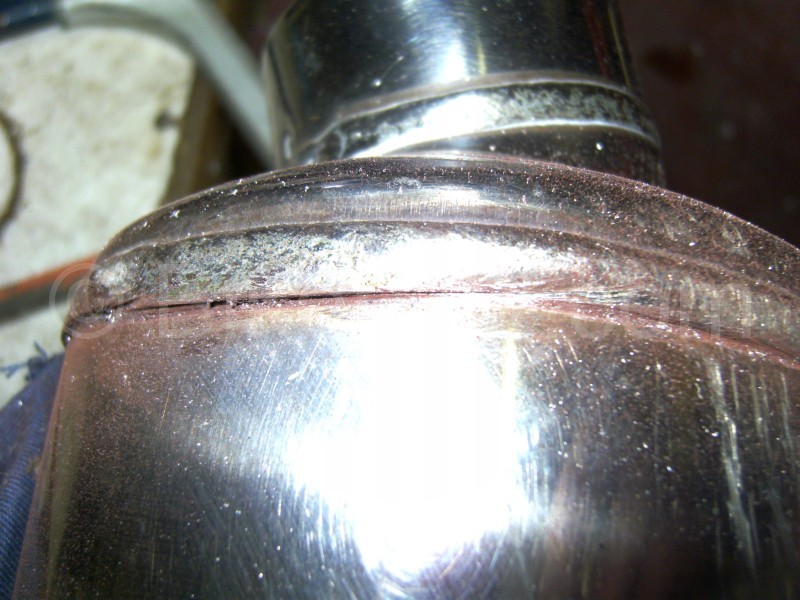
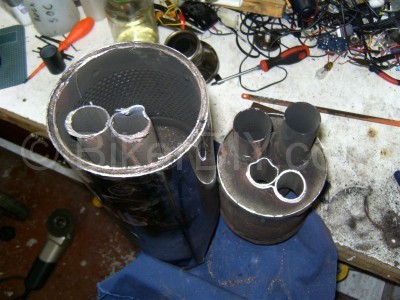
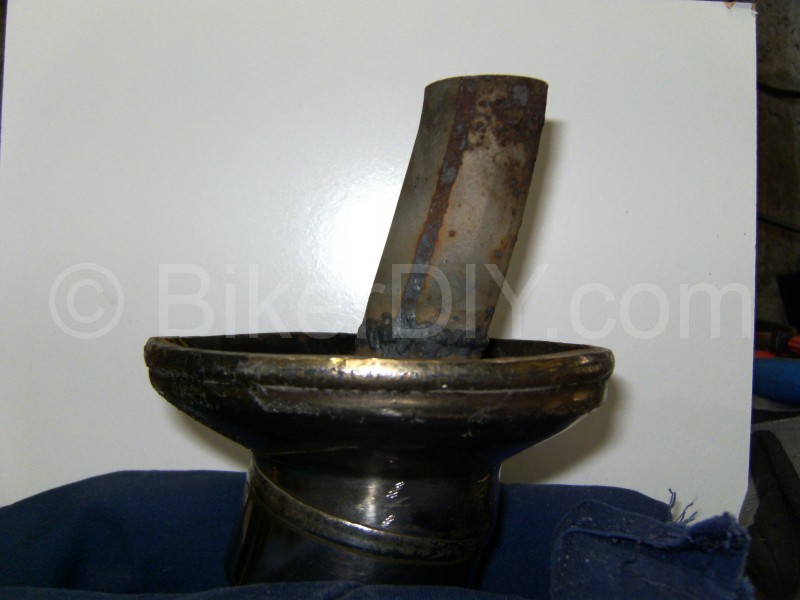
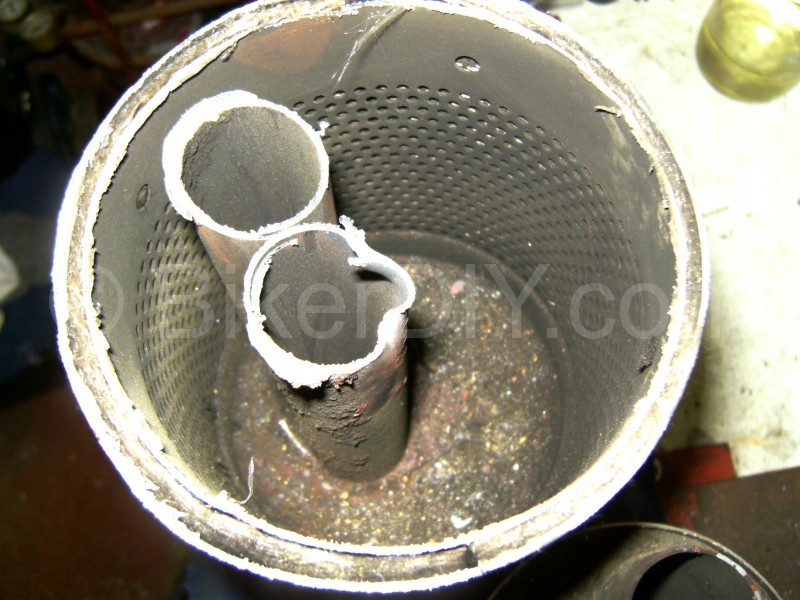
Unfortunately that inside pipe was not a push fit and I had to cut through it afterwards with the hacksaw. Above is what the nearest to the end chamber looks like when it’s first opened up. The steel ring left on the bench (centre picture) is a small piece of the inner steel end cap that reached down into the end can further than the weld seam that I had decided to cut at.
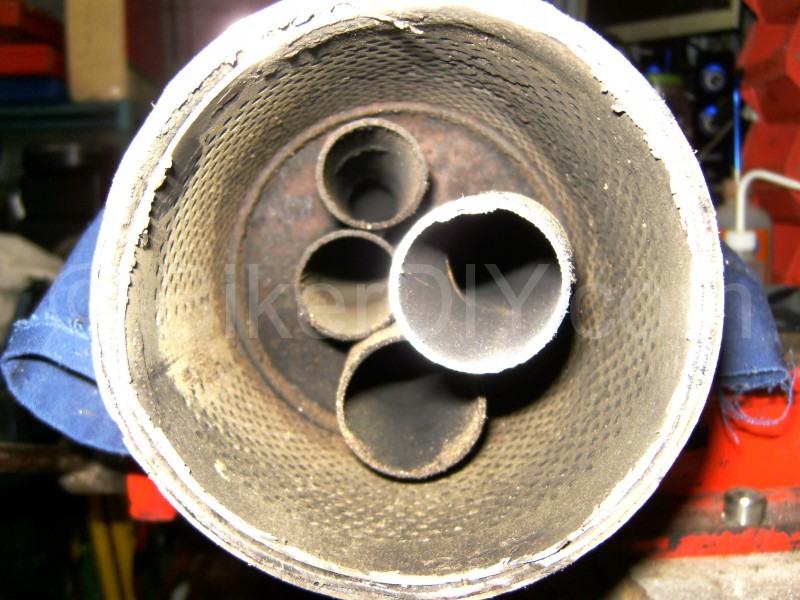
Once I could see inside I realised that the layout of my end cans internals didn’t match the pictures from the only source of info I had used to prepare for this project. Where the forum pictures showed three internal pipes, mine had four (see below).
It is at this point I stopped using anything else as a reference for my exhaust mod and just hoped that in the end I got the result I was looking for, or failing that I suppose, at least a write up on one way to completely F*&k up a perfectly good end can to serve as a warning to others.
The picture above is of the internals of the nearest to the end chamber of my 1995 Suzuki bandit 600n end can (Suzuki no 26EOA) and it will serve as my starting point.
The first challenge was to try and figure out what the internal layout of the end can might be. And given that I wasn’t absolutely sure what might be going on with the three pipes in the exhaust pictures I had seen, then seeing four pipes was even more of a mystery. But after a little while spent measuring pipe and chamber lengths and pushing welding rods through to gauge depths I finally concluded/guessed that the end can internal layout was something like the diagram below.
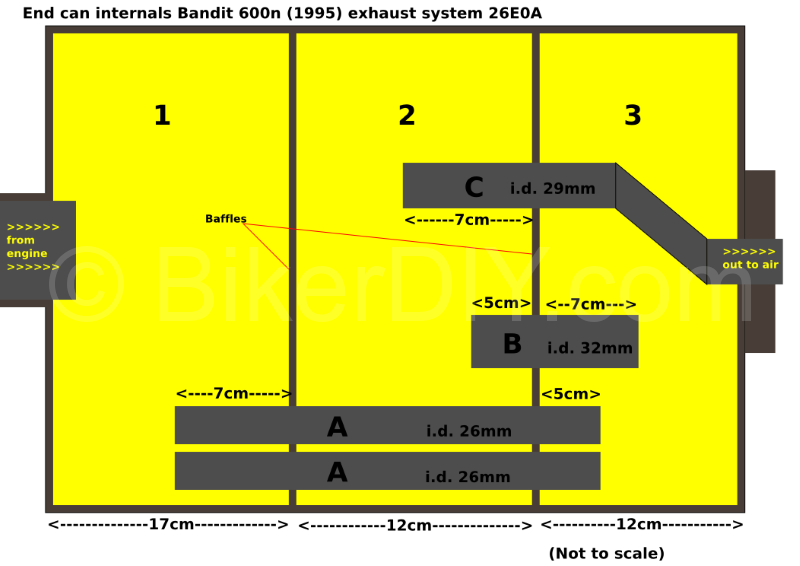 As the “drawing” above shows (I’m a complete “DIYer” when it comes to technical type drawings but I think it demonstrates) well enough how my “before” end can internals are set out. I’m guessing that some of the later on end can’s had a single larger I.D. pipe between chambers 1 and 3 rather than my two pipes hence the images I had seen on the forums. Also I had a bit of a poke around the 650 stock end can as well and it’s layout seems to be similar albeit with larger dimensions all round.
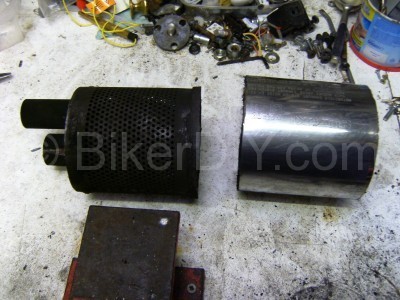
Now that I was more confident I knew what I was looking at (famous last words), the next job was to cut a bit off again. This time straight in with the 4″ grinder at a spot just inside the baffle between chambers 2 and 3. This went the same as the end cap…
except that using the hacksaw to cut through the 2 pipes marked A in my diagram proved difficult as I was also trying to avoid cutting into pipe C (for use later). Although my “technical” drawing doesn’t show it well, they are actually very close together and I ended up breaking the last part of one pipe off roughly as there just wasn’t the room to cut it through without digging into the other pipe (C) with the hacksaw.
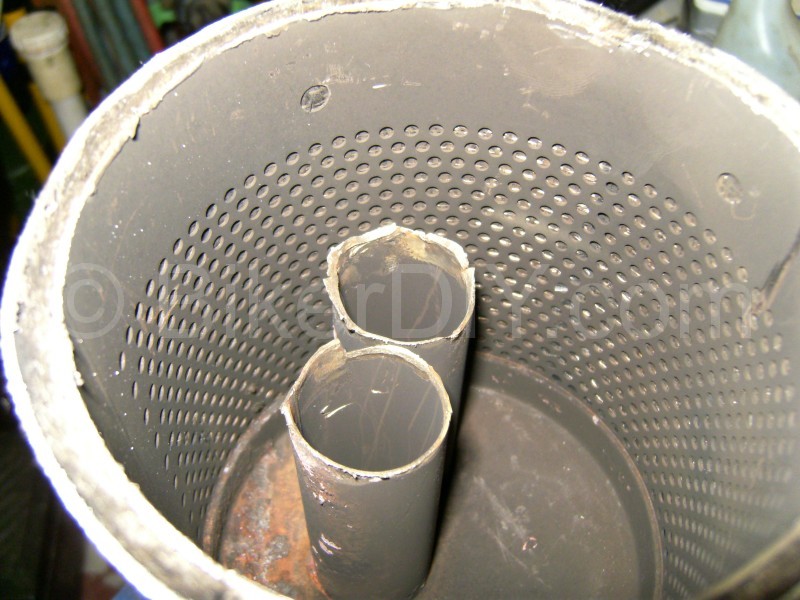
And here it is, the rarely seen (on the internet at least) middle chamber of a bandit exhaust end can.
It would seem likely that at this point that I could just pop the end cap back on “as is” and see how it goes. And while I have no reason to doubt that that could work, I couldn’t help but notice a bit of symmetry to the dimensions in the can’s original lay out.
Now I have no information, knowledge or training to speak of relevant to the design or construction of a motorbike exhaust system but it did seem relevant to me that the inlet pipe to each chamber had a 2cm step to the outlet pipe and that each was 1cm offset to the centre of the chamber. And while I was possibly seeing a pattern where none really existed I elected to remake the end can to this same pattern…
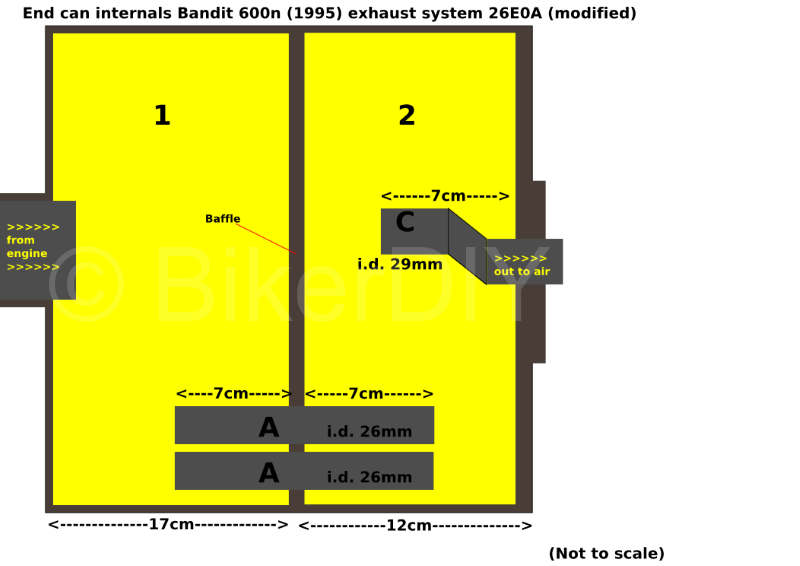
To achieve what is depicted above I needed to shorten the two tubes “A” by 5 cm or so and I needed to add about 7cm to the pipe attached to the end cap which I had cut through earlier. This extension would also need to be offset so as not to run into the 2 pipes “A”. This is why I avoided cutting through pipe “C” when I was removing the end chamber as it had an offset already that I thought might be useful for just this purpose.
The addition of a couple of centimetres of pipe to the end cap was easy enough as I just welded the suitably shortened original offset pipe back onto the end cap.
Shortening the two pipes in the chamber took a little more effort as my inexpensive supermarket pencil grinder wasn’t up to cutting the hardened steel these where made of…
So I ended up cutting them down their length with a pad saw to make narrow strips which I then snapped off with a pliers and once I had the pipes shortened to about the desired length I then rounded up the pipe ends a bit with a large cone cutter in a pillar drill to get them down to this…
The pipe ends weren’t very pretty but I didn’t think that that would cause any issue’s and when the end cap goes back on they won’t be seen again.
I was now ready to have the can closed back up but before I bring it to be welded I figured I should test it to make sure I hadn’t ruined my bikes performance and of coarse to have a listen. So to this end I taped the end can on with wide insulating tape as a temporary measure. As it turns out it was a very temp measure as the heat after a couple of miles caused the tape to slide a bit and the end cap started to rattle, but I got enough of a spin to a) prove that the engine response was unaffected and b) to be very happy with the new sound. It was a little deeper on the moaaaaw and also it had gained just a little crackle and pop on the shut off. Just about the right level of grin factor to suit my taste.
I got it welded up by a local bike exhaust guy who reworked the original weld seam on the end cap (excellent job) and with a little time spent on pickling all the welds (originals included) and polishing it up a bit it doesn’t look half bad either.
But most importantly here’s what my modified bandit 600 exhaust sounds like.
Compared to the original bandit 600 stock exhaust (model 26EOA) sound.
And as for the look of the mod here’s a before and after….
All in all I am well pleased and just a little bit surprised at how well it worked out for a first go. There are a lot of forum threads around the web taken up with “I changed my exhaust and now I have a flat spot” kinds of conversations and because of this I expected it to be a bit more of a dark art “tuning” kind of challenge.
Instead I found that as long as there is some back pressure created by the end can, then nothing that I can detect goes wrong with the engine’s response. I did find when trying the bike with no end can at all or with the cut down end can without the end cap on it, that the engines power was adversely effected which did cause me some sphincter tightening stress during an overtake. I also realise that the sound generated by these two set ups is more likely to be the preferred sound amongst bikers (or at least the bikers I know). So I think the problems many face are in trying to achieve this sound…
while at the same time not hamstringing their engine’s power.
But if your like me and want something more than stock but less than “bleeding ears after a long run”, then my experience is that it can be achieved quite reliably in the shed and for a fraction of the price of an aftermarket can to boot.


Hi, just came across this great post , is it possible to send me a picture of the original exhaust stamping please? I’m trying to check I’ve been offered the correct s/h can for my 600 99 Bandit, it is a 26EOA, thanks
Hi Dave. I’m glad you enjoyed the post. I don’t recall whether the 99 Bandit had the same exhaust as the mark 1 but you can view the endcan stamp details here. http://bikerdiy.com/wp-content/uploads/2024/01/Bandit600_endcan_mod_-27-Copy-scaled.jpg